Selenium Node on Windows 10 Host
This post documents how I set up the Windows 10 Selenium node I was using for generating screenshots about Claro’s components.
Requirements
Almost the same as in the [previous post][win-81]:
- Prepare a Windows 10 VirtualBox machine:
- Download the MSEdge on Win10 (x64) machine with VirtualBox platform.
- Unzip the downloaded file and import the image into a VirtualBox machine.
- Open the settings of the machine, and
- on the Display tab, set Video Memory to at least 27MB
- on the Network tab, change the first network adapter to Bridged Adapter
- (optional:) on the Storage tab, add an empty optical drive to the IDE Controller (for guest additions)
- Start the virtual machine (optionally: install Guest Additions and restart it)
- Download and install the needed softwares:
- Create a new
seleniumdirectory for your files and configurations, e.g in the root of theC:\\drive. - Download and move these components into the new folder:
- The standalone Selenium server 3.4.0 from here.
- The Edge WebDriver compatible with your Edge’s version:
- In case of EdgeHtml 18.x and newer, you have to run:
DISM.exe /Online /Add-Capability /CapabilityName:Microsoft.WebDriver~~~~0.0.1.0in an elevated command prompt (= run as administrator). - For EdgeHtml 17.x or older you can download it here
- In case of EdgeHtml 18.x and newer, you have to run:
- The ChromeDriver with the appropriate version
- The latest geckodriver
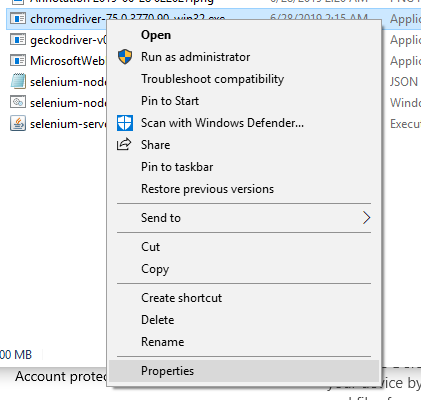
- Make the downloaded chromedriver and geckodriver files executable:
- Open file properties of the webdriver executable:

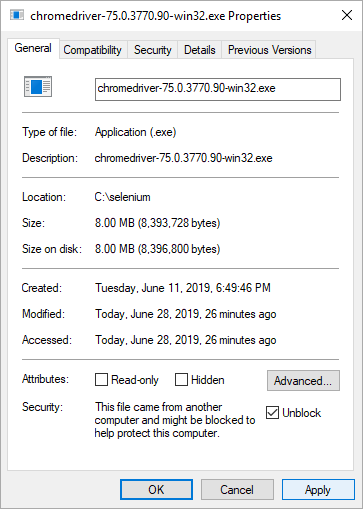
- At the security properties on the bottom, check the “Unblock” checkbox, click “Apply” and hit “OK”.
Configuration and DX
The usual Selenium node config JSON:
1
2
3
4
5
6
7
8
9
10
11
12
13
14
15
16
17
18
19
20
21
22
23
24
25
26
27
28
29
30
31
32
33
34

{
  "capabilities": [
    {
      "browserName": "firefox",
      "maxinstances": 5,
      "seleniumProtocol": "WebDriver"
    },
    {
      "browserName": "chrome",
      "maxinstances": 5,
      "seleniumProtocol": "WebDriver"
    },
    {
      "browserName": "MicrosoftEdge",
      "maxinstances": 1,
      "seleniumProtocol": "WebDriver"
    }
  ],
  "proxy": "org.openqa.grid.selenium.proxy.DefaultRemoteProxy",
  "maxSession": 6,
  "port": 6021,
  "register": true,
  "registerCycle": 5000,
  "hub": "http://localhost:4444",
  "nodeStatusCheckTimeout": 5000,
  "nodePolling": 5000,
  "role": "node",
  "unregisterIfStillDownAfter": 60000,
  "downPollingLimit": 2,
  "debug": false,
  "servlets" : [],
  "withoutServlets": [],
  "custom": {}
}
The batch script which starts the Selenium in node role:
1
2
3
4
5
6
7
8
9
10
11
12

@echo off
if "%~1" == "" (set ip=172.16.0.107) else (set ip=%~1)
@echo on

java ^
-Dwebdriver.chrome.driver="chromedriver-75.0.3770.90-win32.exe" ^
-Dwebdriver.edge.driver="MicrosoftWebDriver.exe" ^
-Dwebdriver.gecko.driver="geckodriver-v0.24.0-win64.exe" ^
-jar selenium-server-standalone-3.4.0.jar ^
-role node ^
-hub http://%ip%:4444/grid/register ^
-nodeConfig selenium-node-config--3.4.0--win10.json
Profit
Launch your local Selenium hub, and in the Windows 10 guest, execute the batch script: selenium-node--win10.bat.
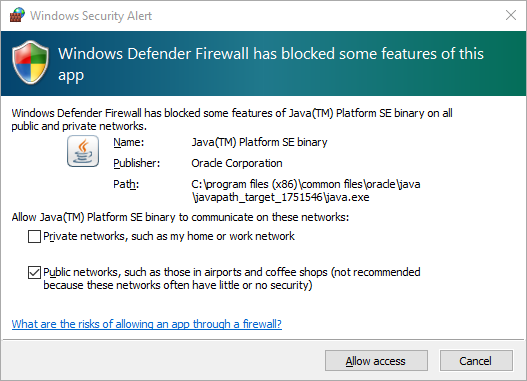
You will get a Windows Defender dialog: you should allow Java to access the network.

If you see “INFO - The node is registered to the hub and ready to use”, you can start using the node.
